To go directly to our converted Camera section of our store, please click here.

You can buy an IR-Only, UV+IR+Visible or High Resolution (HR) converted camera from us, or supply your camera to us for conversion. Before sending us a camera, please make sure it is a camera we convert. IR-Only cameras may have the option of using 715nm or 830nm glass. Each camera usually requires custom optics, and we only convert certain cameras. Click Here For A Conversion Form Types of Camera Conversions / Service
- IR-Only: Dedicated IR cameras. 715nm or 830nm options. Same price.
- High Red: 590nm and 665nm. These cameras pas some visible light and infrared light.
- UV+Visible+IR: Conversions to allow the camera to see it maximum potential from about 330nm UV to 1200nm near infrared.
- UV-ONLY Color: Dedicated ultraviolet light only camera with stock Bayer Filter / Color Filter Array (CFA).
- UV-Only Monochrome: Dedicated ultraviolet light only camera de-Bayeredr /No CFA. Increase sensitivity 6x.
- HR: High Resolution/Hot Rod. AA (Blur)/IR Cut Filter (ICF) filter removal and replacement with a new custom ICF.
- H-Alpha: Limited models modified for astrophotography were and new ICF that passes the hydrogen H-Alpha 656nm frequency. Stock camera ICF/AA filter stack blocks most of the H-Alpha light.
- Black and White: Monochrome or more correctly Panochrome sensors with Bayer filter removed. Currently, very limited availability. Please see some of our B&W pictures.
- Camera Sensor Glass Replacement. Replaced your damaged sensor glass with new factory AA/ICF glass.
- Custom Cleaning Camera disassembly, sensor removal, cleaning, camera reassembly.
Typical turn around is 1 or 2 days after receipt. We are the cleanest, quickest, most knowledgeable and friendliest shop anywhere.
We have been converting cameras since 1999 and in business since 1997. We have a class 100 optical clean bench, plasma chamber, ionized air curtain, static control mats, pressurized ionized nitrogen air guns, lab grade solvents and materials, alignment and calibration equipment and the experience to convert cameras properly. While there are some people that say the conversion can be done on a kitchen table, this is not recommended. Aside from the possibility of breaking a small fragile part or frying an electronic circuit with a small static charge, the glass over the sensor must be extremely clean in order not to have pixels covered on the sensor. Particles that can only be seen under a microscope can become a problem when the particles are directly in front of a pixel on the CCD or CMOS. It is quite unlikely that one will get the glass clean enough without special training and equipment. When you send a camera to us, you can be assured of top quality service. Our conversions are the cleanest in the business and our turn around is usually 1 or 2 days from receipt.
All IR-Only converted cameras will Auto Focus correctly with most lenses n the infrared spectrum at all F-Stops. Most lenses have similar IR focal shifts, and we adjust the focal plane to compensate. All IR+Visible Single Lens Reflex (SLR) conversions will Auto Focus in the visible spectrum. All IR+Visible Electronic View Finder (EVF) will focus in either visible or infrared depending on the filter used on the camera.
All converted cameras involve the removal of the stock ICF / AA glass which is typically a 3 or 4 layer sandwich of various types of glass. Then we replace the ICF/AA with our own custom glass. The type of glass we use determines the type of conversion. Please note that the AA (blur filter) is removed for all camera conversions except for the sensor glass replacement service.
We uses WG280 glass for our IR+Visible conversion and 715nm or 830nm glass for the IR-Only cameras. With the IR-Only SLR cameras, you can see through the lens like normal, but the picture taken will be in infrared. The 715nm glass is similar to the Hoya R72 glass. A 715nm camera conversion will see almost the same amount of light as a stock camera. This means that if you can hand-hold the camera for a stock picture, under outdoor sunlight, you can do the same for a 715nm conversion.
With an 830nm conversion, you will lose about 2 F-Stops or have a slower shutter speed. Notice on the examples below, holding F-Stop constant at F8.0, shutter speed went from 1/500 to 1/125 when we went from 715nm to 830nm. The advantage of a 830nm filter is that the red, green and blue channels are more evenly exposed than at 715nm. The red channel more open on a 715nm than on a 830nm conversion. When you more evenly expose the RGB channels, the camera can resolve better. Also, the infrared effect is more dramatic at 830nm versus 715nm - skies are darker and clouds whiter. The most popular conversion is the 715nm, but the 830nm conversions are increasing in popularity.
With a High Red 590nm or 665nm conversion, the camera sees some visible light and also infrared light. Because your lens is being asked to focus over a wider spectral range, you may have a slightly softer picture (chromatic aberration) or have to compensate with smaller apertures. The is because most lenses have a different focal point for the visible than for the infrared. Depending on your lens, focal point and aperture, you will need to determine if you need to make any manual adjustments.
- 590nm Conversion: Red channel will see infrared and red light. Green channel will see some green and infrared light. Blue channel will only see infrared light.
- 665nm Conversion: Red channel will see infrared and red light. Blue and green channels will only see infrared light.
Camera Conversion Types
All pictures were taken with the same lens but different Canon 5D bodies. Pictures were shot handheld. White balance was set to AWB and ISO 100.
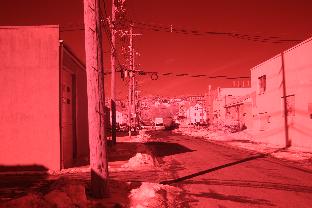 715nm IR Filter Glass in Camera. F8.0 1/500 Second Exp Comp = 0
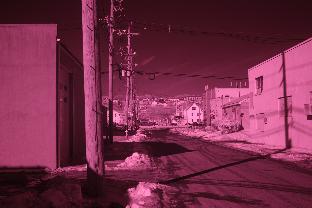 830nm IR Filter Glass in Camera. F8.0 1/125 Second Exp Comp = +2
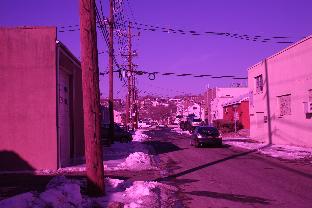 UV+Visible+IR Glass in Camera. F11.0 1/800 Second Exp Comp = -2
 HR Glass in Camera F8.0 1/500 Second Exp Comp = 0
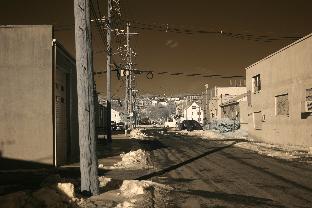
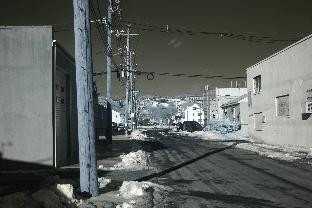
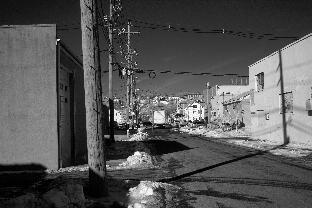
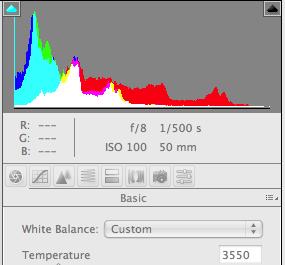
Setting a custom White Balance (WB) will allow you to get a mostly monochromatic image when using an IR-Only camera. You can get different effects by choosing different colored cards when setting white.balance. Popular colors are white, light blue, light yelllow and light green. A common question is "How come the camera takes a red picture if I don't set a custom WB?" The answer is that the red pixels are the most open to IR. The camera doesn't know iit has been converted. As far as the camera knows, it is taking a normal color picture. Since the red pixels are the most open to IR, the picture will be red unless you set a custom WB.
White Balance Examples
| Canon 5D 715nm IR-Only |
Canon 5D 830nm IR-Only |
|
 |
 |
White Balance set to AWB |
 |
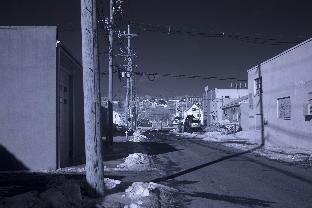 |
Custom WB using White Card |
 |
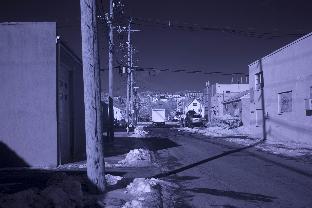 |
Custom WB using Blue Card |
 |
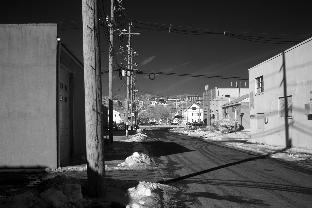 |
AWB WB and simple post processing desaturation |
 |
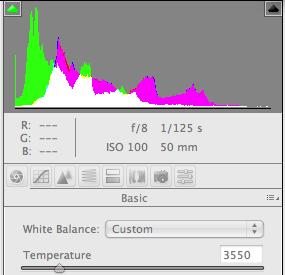 |
Notice how the 830nm color channels are more closely balanced than the 715nm. By having the channels better balanced, the camera can resolve better. This was shot in the winter. A summer time shot would have a greater IR effect. |
We recommend that shooting be done in RAW if possible with all processing done in post applications like Photoshop. Many different techniques exist to create stunning images from a RAW picture. One common method is to optimize the same RAW picture for different areas such as background, trees, sky, etc and then layer the images in Photoshop choosing the optimized areas in each layer. Others will simply convert the picture to black and white optimizing contrast and brightness.
You can learn more about post processing at:
We typically turn around a camera 1 or 2 days from receipt. When you send us a camera, please.
- Pack camera well and ship insured
- Include a fully charged battery for testing
- Include a cover letter with return address and conversion type if applicable (IR-Only or IR+Visible) or use our Conversion Form
- Payment information (PayPal, Bank Transfer, Visa, MasterCard, Check, Money Order, Cash)
- Please do not include: Lenses, Camera straps, Memory Cards or anything extra added to the camera body.
Send to:
- LDP LLC
- 220 Broad Street
- Carlstadt, NJ 07072 USA
Total cost varies by camera and type of conversion. We don't perform every conversion to every type of camera. Prior to sending us a camera, please check with us to see if the type of conversion is available for your particular camera. If you live in the domestic USA, add $40 + $10 per $1,000 insurance for UPS insured ground return shipping.
For International Customers:
When shipping from outside the USA, camera should be marked as a REPAIR and any duties or customs are billable to you. Camera should be insured for market value but use $1.00 for Customs Value. We are not supposed to pay import tax on a customer camera, but, if we are charged, then we will re-bill you. We recommend that you do not use UPS because they charge us an import tax even when camera is marked for repair. UPS will not reverse the charge, so please use another carrier. When we return the camera, you are typically charged a tax on the value of the repair by your country's customs which is not something we have any control of, is not paid to us and is not collect by us. Normally, the shipping company collects the tax on behalf of the country.
NOTE: If you are sending a Canon camera and use their 10-22mm EFIS lens as your primary lens, let us know. The 10-22mm EFIS has a different IR focal point than most other Canon lenses. If we adjust your camera to be sharp with the 10-22mm lens, then other Canon lenses will not be sharp unless you shoot at F10 or high. If we adjust the camera for normal Canon lenses, the 10-22mm lens with not be sharp especially at the corners at 10mm
We convert over a 1,000 of different cameras and add new types frequently cameras. Since we have been converting cameras for over 20 years, we no longer try to keep a list.
Note: We can convert any Canon or Nikon DLSR made during the last 20 years. If you don't see your camera model on the list, that means we just haven't updated to reflect the newest camera model. However, we can convert any Nikon or Canan DLSR camera to US-VIS-IR, there are some conversions that are more limited such as UV-Only or 590nm. Please check with us if you have any doubt with the camera model and the conversion desired.
Many of the digital SLR cameras cost $550 for conversion to IR-Only, IR-Visible or Visible High Resolution (HR). Some cameras and conversions cost more, so please check with us prior to sending your camera in. Monochrome conversions start at $1,500 for an APS sensor camera; we only convert a limited range of cameras to monochrome because each sensor processing parameters must be experimentally determined.
Notes on digital SLR IR conversions: The newer cameras have more modern sensors that perform better in IR light. If possible, use the latest model camera for best results. Of course if you have an old Canon 10D that is not being used at all, it can make a great IR-Only camera, but, newer camera will perform better. All these cameras have sensors based on silicon, so they all have the same basic response curves. However, some cameras have better designed sensors, larger photoreceptors and such making them better than other cameras. As a rule of thumb, you can assume that the visible performance differences will follow the UV and IR performance differences (i.e. If a camera is better than another camera in visible light, it will be better in IR light as well). Another rule of thumb is that cameras with larger photoreceptors (pixels), will perform better than cameras with smaller ones. As manufacturers have packed more pixels into the same sized sensor, we have seen some decline in sensitivity. With the high megapixel cameras, go to a full frame sensor if it is in your budget.
Focusing and Sharpness. Lenses are designed for visible light focus. Some lenses work nicely in infrared, and some don't. Some lenses get hot spots and some lenses just don't focus sharply in infrared. Experiment with different lenses to learn which work best for infrared. On some lenses, you will probably need to stop down to F-8 or so to get sharp focus. On other lenses, you might be fine a F2.0 You may also want to try adding our XDP filter on the lens which will even out the red, blue and green channels better, however you will have to manually focus and set aperture.
Cleaning Cameras. These notes apply to stock and converted cameras.
- Be careful cleaning cameras for dust. Only clean the glass when you really need to because it is too much work to retouch later. You are better off fixing a couple easy dust spots in Photoshop or adding dust or possibly scratching the glass in front of the sensor. With an IR-Only camera, the black IR glass makes it much easier to see dust, and it is tempting to over clean the glass.
- There is no such thing as a perfect image sensor with no defective (hot or dead) pixels or any dust whatsoever. For a typical 50MP image sensor, a consumer camera will have about 5,000 bad pixels. As long as the pixels are not grouped together into too big of a cluster, the bad pixels are hidden in the camera firmware. Cameras are also assembled in a very clean environment, but not as clean as a semiconductor fabrication clean room where the image sensors are actually made. When you look at a camera assembly line, the environment is very clean but the workers are not dressed in the clean room 'space suits' in a Class 10 or better clean room. We have test brand new, never used cameras and found a number of dust specs that ended up on the sensor.
- When you do need to clean, start with the least invasive methods.
- We recommend using canned air first. Be careful not to tip the can to far and spray liquid on the sensor which will leave a stain on the sensor.
- Second, use a fine, small tipped lens brush or cleaning room swab (We sell swabs if needed. Click Here.) A trick before using is to touch the tip to blue painters tape before use so that any dust particles on the tip get transferred to the tape. The sticky pick-up sticks can work OK, but they get contaminated easily and the quality control varies quite a bit. Some leave a slight residue. If using a pickup stick, try to only touch the dust spec itself rather than the entire sensor.
- Lastly, wet cleaning. Make sure to stay away from the sides of the camera because some camera have been known to have an oil film on some internal metal surfaces which can transfer from a brush to the sensor glass. Our experience is that even with lab grade 5 9's (99.999%) pure solvents, an evaporation line will be left. We have sometimes used the product First Contact, but we have reservations about use when the sensor is installed in the camera where it is hard to maneuver.
HR Conversion Pictures
